Before you undertake any project the first thing you need to do is to make a plan.
What are you trying to achieve?
Make a list of pages that you want to include, work out a rough idea of what each page is going to contain (images, gallery, map, text etc.) i.e.
- Home Page (slideshow, snippet about me pointing to About Us page)
- About Us (Selfie, Profile, History?)
- Services (What you can do for a prospective client)
- My Work (Maybe a set of galleries?)
- Contact Page (Contact Details including contact form and map?)
Use this as a base and prepare your own.
Ideally we will have some content to create our website with. We will need some text and some images and idea of the colours and fonts you want to use and a logo.

Text
If you don’t have any text ready yet – for this exercise just grab some dummy text as you need it from here to use from here

Fonts
Chameleon has been designed so you can choose from all the Google fonts for your Headings and Body Text – The range is huge – check it out at:
More info on applying fonts to your website further on in the course.

Colors
It’s a good idea to have a color theme in mind which we will apply further in the course.
A fantastic tool for choosing colors is Adobe Color – check it our here:
https://color.adobe.com/create

Images
There are a bunch of images you will need: Your logo, images for your site and maybe an image of yourself. If you prep these before starting you will find the flow of site building much smoother,
You’ll need your logo in a few different sizes as follows:
- Favicon 32 x 32 pixels (px)
- Touch Icon 144 x 144px
- Logo to fit the size 250 x 60px
- Retina Logo (twice the size of your logo) – i.e. no larger than 500px x 120px
Page header images: approx 1600 pixels wide x 600 pixels high.
Slider and Parallax images: 1600 pixels wide x 1000 but this may vary depending on whatever height you set your slider to.
Gallery: A selection of images resized to about 1000 pixels wide or 800 pixels high.
How do I resize my images?
If you have photoshop or similar then great – you can use these tools to resize – if you don’t have any applications for resizing images you can do it online at various websites:
https://picresize.com/ this one is good, you can do a bunch at a time …
You don’t have to have all of these but it will make for a smoother exercise if you have them prepared.
Your Workspace
Below are some tips to make your workspace easier and more productive.
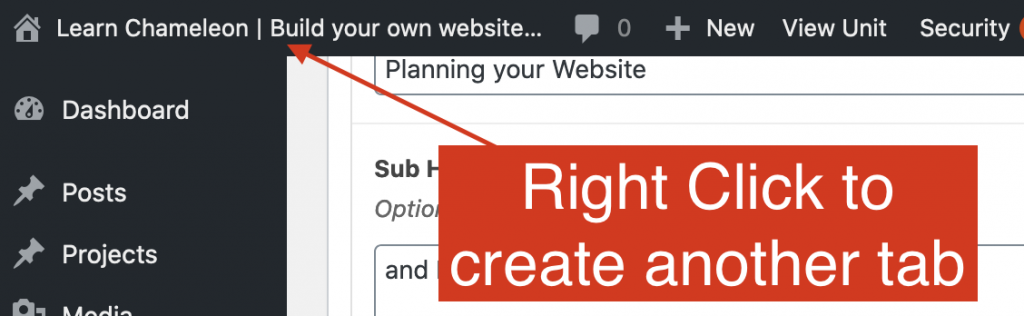
Small Screen or Laptop
Open a browser with the WordPress Dashboard > Right click the site name in the top left to create another tab – toggle between these to see the front and back end of your site when updating content. And have another tab for the course so you can easily toggle between your site and course tutorials.
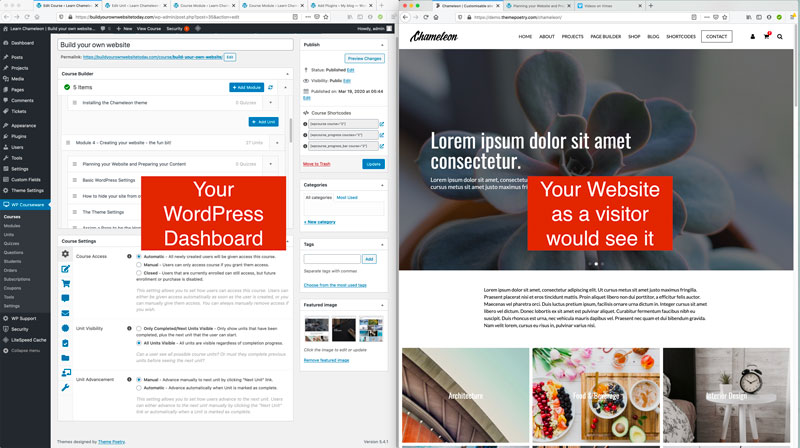
Larger Desktop Screen
If you have a large screen a great way to work is to open two windows and have the Dashboard in one and the Front end of your site in the other as per below (On the Front End also have another Tab open with the course on it so you can toggle to the course – and see the instructions as you carry them out on the left hand side of your screen AND for easy reference you could even had another tab showing the Chameleon demo!):